Shicho

August 17, 2010

Attack and Defense: Inducing Moves

Attack and DefenseChapter 6: Inducing Moves

Right, so what are we even talking about, here?  From the horse’s mouth:

“[Inducing moves] can be looked at as a special kind of forcing move, but with the difference that instead of simply trying to make the enemy submit, they try to make him cooperate.”

Here, we seem to be talking about moves that encourage the opponent to make moves that ‘force’ you to play the move you wanted to play to begin with. You get the move you want, and a stone in place somewhere else.  If one makes the move directly, the opponent can respond, and may do so in such a way that you lose your chance to get that stone in elsewhere.

I may be wrong, but it seems that what we’re talking about here is a matter of timing.  Get the inducing move in when you can, before the opportunity vanishes.

But yes, the overall idea seems to be to make the opponent make a move that makes your next move more efficient.

Some key points in the chapter:

  • “Force before defending” say Davies and Ishida
  • If you have a move you really want to make, look around and see if there’s something you can get in first, something that the opponent can’t ignore that you must get in before the move you want to make.
  • Just as with other forcing moves, it’s important to look for ways that the move might be resisted.

August 16, 2010

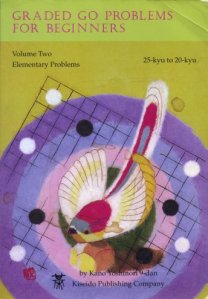
Graded Go Problems for Beginners, Volume 2

Filed under: baduk, go, igo, Kano Yoshinori, Problems, weiqi — Tags: , , , , , — Ingrid @ 11:09 pm

Graded Go Problems for Beginners, Volume 2So!  I did indeed have a go at the problems in this book, and despite the 25- to 20-kyu rating, I did not get them all correct on the first go!

Part of this is because I was zipping through the problems.  On a few occasions, I didn’t read properly and got caught out, and in a few other cases, I didn’t pay close enough attention to who was meant to play.

If I’d been a bit more careful, I have no doubt that I would have made 100% (or at least very close) with not very much effort, but this was a nice little reminder that one does need to read and shouldn’t take things for granted, even when they have ‘beginners’ in the title!

As with Volume 1, I thought the book covered an excellent range of topics, and I would most certainly recommend Volume 2 for players in their teen-kyus (and early single-digits, for those who have not come across the series before).

Given my success rate for Volume 2, I suspect I’m going to need to set aside some serious thinking time for Volume 3!

Attack and Defense: Forcing Moves

Attack and DefenseChapter Five: Forcing Moves

Okay, the whole issue of forcing moves is something I struggle with.

I remember discovering the idea of rudimentary forcing move when I was in that nebulous somewhere-below-20-kyu cloud. Once I awakened to the fact that there were moves that black could play that white just had to answer, I played such moves left, right and centre, without regard for the fact that I was usually erasing aji, making poor exchanges, destroying ko threats, forcing white to play the moves that white wanted to play anyway, and, sometimes, making a fake forcing move that white could ignore. I also was very protective of each and every stone I played.

Then, when I discovered that one often plays a forcing move and then something else completely, not necessarily minding if the forcing-move stone gets captured, I started littering the board with cast-off stones that I played and then smugly ignored, not having any sense of how to put them to use.

Of course, these were not winning strategies. I quickly learned that just because one can make a move that the opponent must answer, one often shouldn’t. My game improved dramatically when I quit doing so.

The question is whether or not I’m now at a stage where I can recognise a good forcing move from something that shouldn’t be played. Come to think of it, it has been a long time since every game that I play contains at least one ‘thank-you’ move, according to r4d and others who have generously reviewed games with me. I now (at least try to) approach dead-stones-with-aji with caution – if I don’t know what to do with the stones, I often leave that part of the board alone and wait to see what develops. I still sometimes settle things that could be left for awhile, but things are certainly better than they were once upon a time. And, come to think of it again, I am sometimes told that I might as well get an atari in for free, just so a stone is there, in case I want it later. Hmm, lurking forcing moves are going unforced…guess it’s time to think about all of this again.

I think the first example in Chapter 5 is very useful for demonstrating a situation where white can make a forcing move that black has to answer but that doesn’t (a) do anything for black or (b) do any harm to white. It feels (to me) that the advantage of having the black peeping stone on the board gives black more of an advantage than leaving the peep as a possible ko threat.

I found the examples in the first section much easier than the using-peeps-in-attacking problems, but I think it is sometimes quite difficult for me to determine when a forcing move is appropriate. There is always the possibility that the opponent will ignore the forcing move and carry making moves in the area I was intending to play next. It’s one thing if a book asks me to pick out the forcing move and a very different thing if I’m in the middle of the game and have to determine whether there is a forcing move available and, if so, if it should actually be played.

When I mentioned such worries to r4d, he recommended Beyond Forcing Moves by Shoichi Takagi and also said that a good rule of thumb is probably ‘if in doubt, leave it out’ when it comes to questionable forcing moves. My problem is that I doubt every forcing move, so I suppose some experimentation and some more reading is in order!

I’m rambling here and not saying much of anything to bring in to my next game. Let’s give this a try. Right. Here are some basic things to remember about kikashi:

  • Look for moves that the opponent must answer that do not harm you and do not benefit the opponent.Peeps and ataris are places to look for forcing moves.
  • Look out for moves that are forcing moves for both sides – these are very important!
  • Make sure the forcing move can be played and then forgotten. Can the opponent resist in some way that will force you to patch up?
  • If an opponent plays a forcing move, look for ways to resist that makes the enemy forcing stone pointless.
  • Just because it’s sente doesn’t mean it’s a good forcing move!
  • Be especially careful of ‘forcing’ (e.g. inviting) an opponent to patch up a cutting point!
  • Be wary of ‘forcing’ moves that destroy potential, erase ko threats or lose liberties on groups.
  • If dithering about whether or not to play a ‘forcing’ move, perhaps best not to play it.
  • Order can be important. More than one forcing move might be available if moves are made in the correct order.
  • Forcing moves play a key role in high-level play, so perhaps a key to understanding mysterious pro games is to think about whether a crazy-looking move is somehow a forcing move, and, if so, what it is threatening if the opponent doesn’t respond.

Attack and Defense: Defense

Attack and DefenseChapter 4: Defense

“Escape is easy; capturing is hard.” (Oh, I wish it actually felt this way during my games!)

For the record, the move in Diagram 3 (the game between Go Seigen and Kitani) is exactly the kind of professional move that it so far off the radar, I’d only ever end up playing it if I hiccuped and dropped my stone at random when it was my turn to move. I guess the moral of this game is that one need not be in a hurry to attack when one is in a good position. Still. Woosh.

But, wait – woo! I ended up guessing Sakata’s move correctly in Diagram 6 (the Sakata versus Takagawa game)! Maybe there is hope for me after all! And Ishida versus Rin Kaiho? Well, I thought of two moves. One was the actual move played, but I talked myself out of it. (The move I went for in the end was actually as ridiculous as I’d decided the ‘correct’ move was. Ho hum. There’s a reason I’m not a pro. But hey, at least the there was a blip on the radar, even if I didn’t believe in it!  Of course, I read the book before, so it’s possible that the answer was lurking there in my subconscious even though I didn’t remember the board position.  Oh, great Go muse, when are you going to descend from the heavens and bless me with your magical game-winning intuition?)

Uh, yes.  So Attack and Defense.  Interestingly, this chapter is talking a lot about balance of power, and seems to be using much the same language as The Direction of Play. The moral of the first part of the chapter is that defending weak groups builds power that one can activate later on by attacking the opponent from a solid base.

Normal defensive moves, according to I&D are one-point jumps, hanes, extensions; nice, normal things. However, the chapter also discusses defensive tesuji that can come in useful in emergencies.  I&D gave several examples of contact plays or near-contact plays that can be wheeled out when one is defending in a tight spot. There are several examples of contact plays underneath or on top of enemy stones (relative to the edge of the board), and then some examples of near-contact shoulder hits.

To me, all this seemed more difficult than the chapters on attacking, perhaps because the defensive moves were less easy to categorise.  Compared to the attacking moves in the last chapter, they seem more position-dependent.  I think one could go  a long way with the attack moves when just thinking about shape.

What can I extract from this chapter, then?  Hmm.  It seemed that in each example, the defender was trying to place stones that were flexible and had various possible follow-ups, depending on how the opponent responded. A key feature in many of them seems to be playing stones that are easy to give up in order to gain headway with other stones.  When struggling for life or to avoid being enclosed, contact plays and shoulder hits often allowed the defending group some wriggle room.

I hesitate to list or label the contact and shoulder tesujis discussed as I can’t confidently isolate the important stones in the positions; a knight’s move is a knight’s move, an angle point is an angle point, but there are 18 stones in the standard contact tesuji shown in Diagram 23 in the ‘Defend with Contact Plays’ section’.  I could take a guess at which stones make the tesuji and which can vary depending on circumstances, but it would only be a guess.

I feel like this chapter is going to take a bit more work to come to grips with, and there are still some loose ends from this reading.  In particular, I need to think more about Diagram 10 (page 95), Diagram 26 (page 99) and Diagram 5 (page 102).   Methinks a board is here required….

Graded Go Problems for Beginners, Volume 1

Filed under: baduk, go, igo, Kano Yoshinori, Problems, weiqi — Tags: , , , , , — Ingrid @ 6:53 am

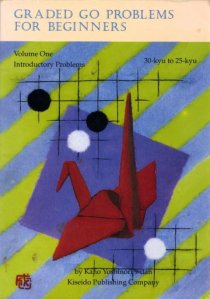
Graded Go Problems for Beginners, Volume 1I recently discovered an old piece of paper with notes from the very first time I went through my very first problem book, Kano Yoshinori’s Graded Go Problems for Beginners, Volume 1. I think this was the third book I read about Go, after two introductory books (Teach Yourself Go by Charles Matthews and Go for Beginners by Kaoru Iwamoto).

I read through the entire book this morning, just to revisit. It was so fun to have my notes which included a list of problems I got wrong, a smaller list of problems I got wrong repeatedly, and a list of things I needed to play out on a board. I also have a few questions like ‘why is white here illegal?’ (answer: self-atari) and a message of despair over a problem that required one to give up a small clutch of stones in order to make a group live (‘but I want it ALL!’). I’m so happy to have my notes – it was so fun to have a glimpse into my double-digit kyu brain and, after the nigh-impossible problems I’ve been doing, it was a nice break.

Even though the problems seemed extremely easy this time around, the book still really impressed me. So many of the fundamentals were right there, and the range of material covered is excellent. It’s a wonderfully comprehensive book of first problems, and, frankly, I have a hard time imagining how it could be improved. I think it provides an excellent foundation in most aspects of the game.

The only (very minor) problem I had with the book is that I was a bit demoralised by the recommended rank on the cover. The book is supposedly for 30 to 25 kyu players, but some of the problems require a bit of advanced thinking for an absolute beginner, particularly a few of the tesuji and life-and-death problems. Luckily, I had someone around who could tell me, ‘yeah, ignore the rankings; some of these aren’t 25-kyu problems’. Even just this evening, I heard them jokingly described as being for professional kyu-level players, which made me smile.

I remember reading Volume 2 (and have my notes from that as well), but I don’t think I made it through Volume 3, let alone Volume 4; I might just have to give them a look-through now….

August 14, 2010

Attack and Defense: Attacking Moves

Attack and DefenseChapter 3: Attacking Moves

The chapter begins with a few basics:

  • “Don’t touch what you are attacking”.
  • Contact moves often let the opponent strengthen the stones that are being touched.
  • When choosing an attack, look for the severest move possible.

Ishida and Davies then discuss five different types of attacking moves, illustrating each with useful examples. Since the ideas are developed through a discussion of the examples themselves, there’s not much that I can extract cleanly from the text, so instead, I’ve made a (waaaaay-too-reductive!) table where I’ve listed the five attacking moves alongside their main attacking function, as I understood it from the discussion and examples. (See the end of the post.)

Again, most of the meat of the chapter is in the diagrams and resulting discussion, but here are a few more general points extracted from each of the sections.

Eye-stealing tesuji

“The strongest attacking moves are those that ruin the enemy’s eye shape, and foremost among them is the eye-stealing tesuji.”

Angle tesuji

Funny story about this. When I first saw ‘angle tesuji’ once-upon-a-time as a mega-double-digit kyu, I somehow read it as ‘angel tesuji’. I’m not sure whether I just read it incorrectly or if it was actually spelled wrong, but ‘angel tesuji’ is what imprinted itself on my brain. I imagined the shape to be angel wings, with one wing the wrong colour – white, say, would like to make a nice pair of perfect angel wings, but if black got in their first, black could destroy the chance of a perfect set of wings. I’m not exactly sure why I felt the need to construct such an elaborate story, but there it is. Reading this section reminded me of it.

I’m still not sure why the angle tesuji is actually a tesuji and not, well, just a good move. Actually, I have that question about a lot of tesujis.

Knight’s Move (Keima)

Very useful for trying to herd the opponent in a certain direction or toward something; also useful for trying to expand or wall off a framework. If a keima can do both at once, all the better!

Capping

Plopping a stone above another stone (often a one-point jump away) is useful for stopping the opponent from expanding in the direction of the cap. Sometimes the opponent’s stones can’t be completely contained, but they can be forced to wiggle a bit in order to escape. This can also be good.

Peeps

Often, peeps are used in combination with other attacking moves. The peep allows one to get some stones in place to support other attacking moves.

Note to self: In the problem section at the end of the chapter, review problems 3, 6, 9 & 10.

Eye-stealing tesuji Take away eye space
Angle tesuji Take away eye space
Knight’s attack Herd opposing stones in a certain direction and/or build a framework whilst attacking
Capping attack Stop opposing stones, or force them to struggle to escape containment
Peeping attacks Take away eye space, probe, contain opponent’s stones, etc.

August 11, 2010

Rengo Extravaganza, Round 1!

Filed under: baduk, Community, go, igo, weiqi — Tags: , , , , , — Ingrid @ 6:41 pm

Rengo Extravaganza, Game 1

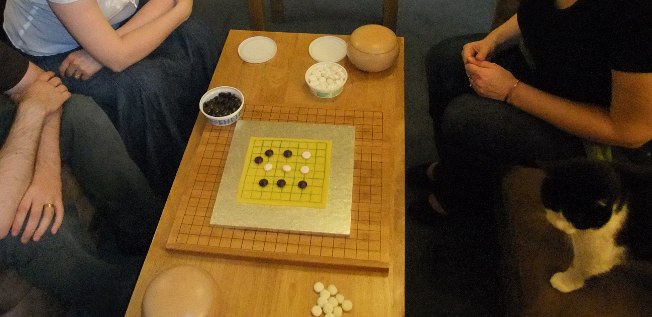
Last week was the first of hopefully many wonderful evenings of cake and rengo. This time, r4d had to step in for my newly-appointed official rival (more on this to follow), but in theory, there are four of us who play at roughly the same strength, so I’m looking forward to some good games.

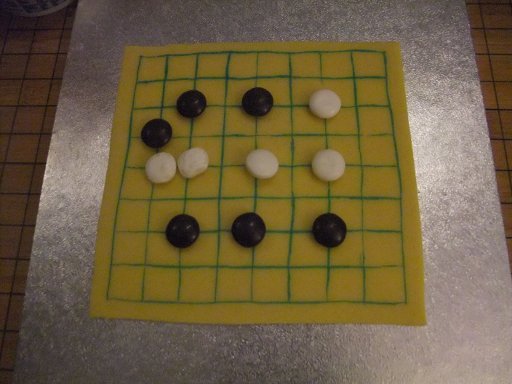
A highlight of the evening was definitely the 9×9 marzipan with chocolate and mint imperial pieces. Many prisoners were devoured….

9x9 Marzipan Joy

Attack and Defense: Attacking Strategy

Attack and DefenseChapter 2: Attacking Strategy

Gracious, this chapter is full of things to think about!  The thoughts below are half ramble, half lists, with no real transition in between.  I could tidy it up, or I could read more about Go before the looming Isle of Man tournament….  I think I’ll opt for the latter!

Introduction

It’s already been said in Chapter 1, but Ishida and Davies find it worth repeating:

“It’s the player with the weak groups who should be taking the risks, not his opponent.”

  • Gain ground, then take time to consolidate.
  • If allowing the opponent to live small allows you to consolidate your own territory, sometimes letting the opponent have a tiny bit of territory is better than trying to kill everything in sight

Also, I’m not so good at mentally erasing 40 moves from a diagram, so I have to lay things out on a board sometimes.

Just in case anyone else has the same trouble, here is the situation in Diagram 1 (the first diagram of the chapter) before the 40 moves numbered have been made:
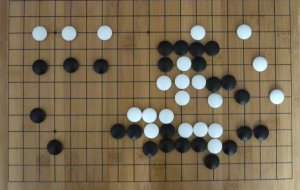
Attack and Defense - Chapter 2, Diagram 1, no numbered moves played

and here is the situation in Diagram 1 at move 21:
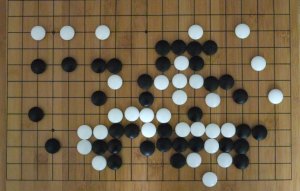
Attack and Defense - Chapter 2, Diagram 1, Move 21

Attack to Gain Territory

In the first Diagram in this section, there is an interesting problem in which the reader is asked how to attack a weak black group at the bottom of the board. Two moves are available, one that takes eyespace away along the base of the group, and one that attacks from above, and looks to me to be an extension of a big white wall.

The last time I read this, I got the problem wrong because I’d just been reading books warning against not using one’s influence to build territory, and I was blindly trying to apply that idea to this position. In many discussions of influence, strong players seem to warn against using big, thick walls to build territory. Usually, there is some situation presented where one can use a wall to surround a little bit of territory, or you can drive enemy stones into one’s sphere of influence and make profit elsewhere on the board. This problem seemed to me to defy that sort of thinking.

This time around, the right answer looked right to me, which I guess is progress. So, what is the difference from the great-white-wall type of problems? It looks to me like in this case, black has a lot of settled or mostly settled territory around the edges already, so white’s plan is probably to either take a large part of the centre while black fixes up the sides. (Ishida and Davies call the centre white’s “chief asset in the game”.) Also, that big, thick white wall doesn’t look all that big and thick to me this time around. It looks a bit more, well, like something that black might want to hassle if he gets the opportunity. So, by making an extension from those white stones, white is helping to make them stronger.

  • When attacking, think less about how to kill the opponent’s group, and more about which direction to attack from.
  • Try to drive the opponent’s stone through ‘neutral space’ where neither side is going to make a lot of territory.
  • If possible, choose a direction of attack that allows you to build territory or influence in open spaces.
  • If possible, find ways to attack that will weaken the opponent’s other stones whilst he or she takes time to look after the stones under attack.

Running Battles

  • Look for moves that allow you to strengthen yourself whilst weakening the opponent’s stones. Sometimes a running battle provides an opportunity to do this.
  • Don’t push enemy stones in a direction that will weaken your own stones or allow the opponent to strengthen his or her own position.
  • Running battles don’t necessarily have to happen in the middle of the board.
  • “A struggle for power is basically a struggle for eyespace.”

Indirect or Leaning Attacks

Diagram 2 in this subsection is another problem that I got completely wrong before, also because I applied a rule-of-thumb that was misleading in this case. This time around, the correct sequence looked correct to me, but I remember worrying about it before, since black appears to be committing the cardinal sin of ‘pushing from behind’. I distinctly remember feeling woefully confused; Black 1 in Diagram 2 was not even on my radar at the time, and the 1-6 sequence seemed to contradict things that I was being told would improve my own game.

The discussion makes it more clear why pushing from behind is good in this particular case, but I double-checked the situation with R4d, just to make sure. He agreed that one should usually be hesitant to push from behind, but that in this case, there are several factors at play. First, white is very strong and the 5 black stones in the middle right are on death’s door. So, it is not surprising that, locally, white is at an advantage. Second, if one considers just the middle right and upper part of the board, black’s pushing from behind does have a great cost locally. Black loses a lot. However, when he strengthens White, he’s strengthening a group that is already strong, so it’s not as dire as if black were strengthening a weaker white group. Third, in this particular situation, the local loss is compensated by the power of move 7. Black gets to attack white, defend the corner and build territory all at the same time. It has so many advantages that it is worth considering a local loss elsewhere on the board.

  • Sometimes, one can build up power for an attack by making plays that lean on enemy stones that you don’t mind strengthening in order to strengthen your own stones in preparation for attack on other enemy stones.
  • Leaning involves contact plays or a ‘shoulder’ hit (katatsuki?).
  • A leaning attack going wrong tends to be less devastating than an all-out, brute-force, in-for-the-kill attack going wrong.
  • In the authors’ words, “leaning attacks like these are the esseance of go”!

Divide and Conquer

  • Look for opportunities to attack two weak groups at once by sticking stones in between them.
  • If two weak groups are far apart, just sticking a stone on the midline might not be that threatening. (See Diagram 9 in this section.)
  • If two weak groups are really, really far apart, try chasing one side toward the other until the gap between them is narrow, and then stick a stone in between them.
  • Having two week groups on the board at once is…dangerous.

Cuts

  • A cut can be thought of as a splitting attack in which there are two weak enemy groups very, very close to each other.
  • Be careful about cutting off something small enough that the opponent doesn’t mind losing. This can help the opponent consolidate the bigger part of the group. (Sometimes it’s better not to cut than to only cut off something small.)
  • Sometimes, herding stones in a direction that keeps them weak or that allows you to keep up an attack on them is better than cutting and allowing the opponent to make nice shape.

In the game between Akira Ishida and Chen Zude at the end of the chapter, I think it’s lovely how white gets in the dual attacking moves 21 and 23 in Diagram 27 before starting the ko!

Note to self: come back to the example problems in the ‘Leaning Attacks’ and ‘Cuts’ sections…and look for some problems involving these kinds of situations. Maybe Get Strong at Attacking should go on the reading list?
August 10, 2010

Attack and Defense: Territory and Power

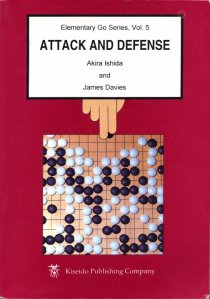
Attack and DefenseThe Isle of Man Go Tournament is coming up, so it’s time to get serious and reread Attack and Defense. I read part of this book somewhere in the middle double-digit kyus (at which point I found it quite hard going), then again around August 2009 (which I remember because it resulted in a 1-stone spike in my KGS rating which lasted for a couple weeks).

The thing about Attack and Defense is that I keep coming across situations in games that I know are covered in the book. There’s nothing more frustrating in the heat of battle than the nagging feeling that you’ve read about exactly the situation on the board in front of you, but have forgotten everything.

So. Onward.

Chapter 1: Territory and Power.

Here is my list of important points to remember about that are discussed in Chapter 1. Of course, it’s all rather meaningless without the discussion and diagrams, but hopefully writing them down will help me keep them in my head when I play.

  • One way to think about the game is as a balance between territory and power.
    A simple way to estimate territory in the middle game is to compare white areas and black areas to get a general sense of who is ahead.
  • “A rich man shouldn’t pick quarrels”: if ahead in territory, play safe and simple; if behind, look for ways to mix things up a bit.
  • One’s opponent is entitled to some territory. Trying to kill everything on the board often leads to weak, overextended stones.
  • Don’t guard your own territory too jealously, or else you might miss the chance to attack or expand elsewhere.
  • One who leads in the balance of power has stronger groups and/or well-placed stones that radiate influence, making it easy to go on the offensive, enlarge territory or take the initiative.
  • Thickness is strength!
  • Use power to attack, invade, or to cut the opponent’s group to initiate a fight.
  • Make use of power by playing aggressively, exploiting weaknesses in the opponent’s stones.
  • When behind in power, patch up weaknesses and play solidly, thereby building up power.
  • When leading in territory, one shouldn’t think only about gaining more territory; it’s also important to think about how to cancel the opponent’s power.

A great, motivational quote from Chapter 1:

“If power is useful to have, then it can be worth spending moves to acquire. Realizing this can change one’s whole attitude toward the game. One learns to evaluate moves, not only in terms of the amount of territory they create or destroy, but also in terms of what they do to the balance of power. One learns to build up thickness and influence, then use them to gain profit later.”

The Direction of Play

Filed under: baduk, go, igo, Middle Game, Opening, Problems, Takeo Kajiwara, weiqi — Tags: , , , , , — Ingrid @ 12:47 am

The Direction of PlayThere’s nothing more satisfying than returning to a book that one put down once-upon-a-time because it was too impossibly difficult and finding that it has magically become readable. This was my experience with Takeo Kajiwara’s The Direction of Play.

I remember looking at the book when I was somewhere between 19-15 kyu. I enjoyed Chapter 1, but gave up soon after that because I didn’t feel I understood what was going on.

This time, I felt I was able to at least follow the commentary and appreciate what was going on. I think I am a long way away from being able to apply the ideas in the book to my own games (I only got two of the seven problems correct in Chapter 7), but I still feel it was worth reading at this stage. If nothing else, it gave me a little insight into whole-board thinking, and presented a framework with which one can think about one’s games (i.e. the idea of considering the direction in which stones exert their power). I’m just beginning to think about reviewing professional games, so I really appreciated reading the in-depth analysis of the games that were included.

It’s difficult for me to formulate a take-home message for this book – I read it hoping to get a general feel for direction of play rather than for specific techniques or strategies. I liked the imagery in the book, and I think it may prove useful to think about stones as radiating power, and reaching out toward different parts of the board. Hmm. When I come to put these sorts of things in words, it all sounds a bit nebulous. I suppose that’s because of the nature of the book. It’s definitely one of those reads where the sense of a general concept begins to glimmer through a lot of specific examples which need to be taken as a whole.

Perhaps a reread when I’m stronger is in order. There was a lot of talk about when to depart from joseki and when various joseki are good or bad. I didn’t get the sense that I had to know lots of joseki to follow the text, but I suspect I’ll get more out of some of the examples once I can consider the positions with a repertoire of joseki at my fingertips.

Older Posts »

Create a free website or blog at WordPress.com.